What to expect during a roof replacement, step by step
By Diego Fischer · Updated 2026-07-18
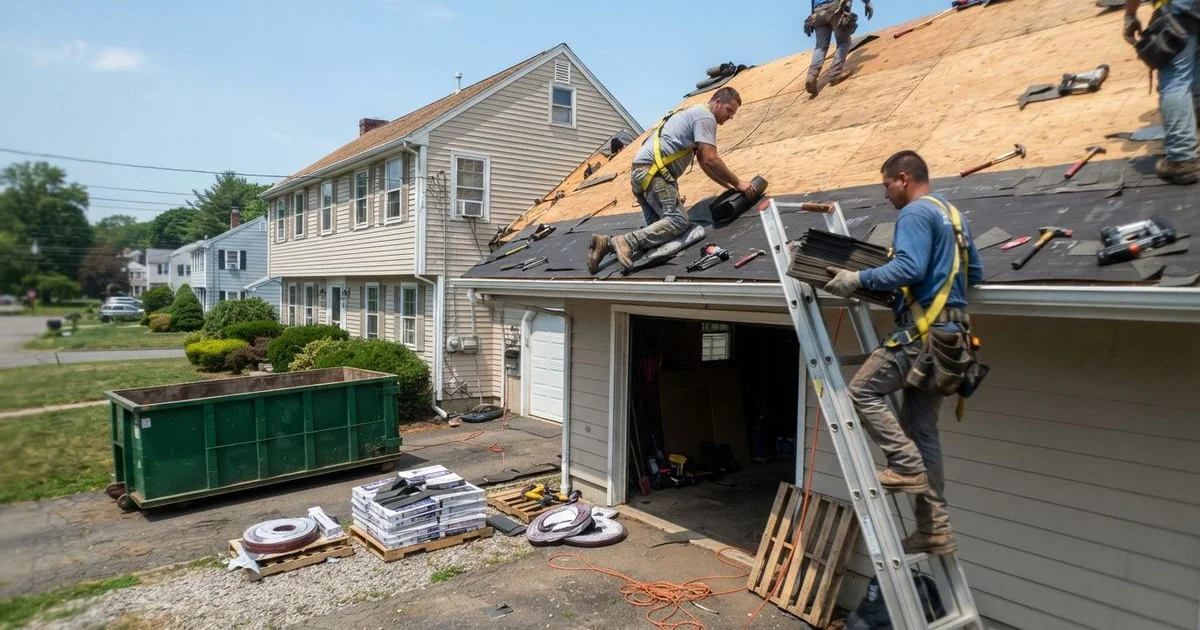
Knowing what a roof replacement actually involves takes some of the stress out of it. Once you have chosen a roof replacement contractor, the job itself tends to follow a predictable sequence, even though the exact pace depends on your roof’s size, pitch, and condition once the old material comes off.
Before the crew arrives
A good contractor confirms the material order, pulls any required town permit, and schedules the dumpster or debris trailer before the first day. This is also when they should walk you through what to move or protect: patio furniture, grills, cars in the driveway, and anything fragile near the exterior walls. Ask what happens with your gutters, AC condenser, and any solar panels if you have them, since those need protecting or temporary disconnection. It is also a good time to confirm a start date window rather than an exact date, since roofers commonly build a few days of slack into their schedule for weather.
Day one: tear-off and inspection
The crew strips the old roofing material down to the decking, which is the plywood or board layer the shingles sit on. This is the loudest, messiest part of the job, and it is also when the contractor gets their first real look at the condition of your roof structure. Soft, rotted, or water-stained decking gets flagged here. A contractor who tells you about a decking problem before covering it back up, with photos, is doing the job right. One who never mentions it either has a very lucky roof or is not looking closely.
Underlayment, flashing, and ice-and-water shield
Once the deck is exposed and any repairs are made, the crew installs a water-resistant underlayment across the whole roof, with a self-adhering ice-and-water membrane along the eaves and valleys where Connecticut winters put the most stress on a roof. New flashing goes in around chimneys, skylights, and anywhere a wall meets the roofline, since old flashing is a common source of leaks even on roofs that otherwise look fine. Drip edge gets installed along the perimeter to direct water into the gutters properly.
Installing the new roofing material
With the roof properly prepped, the finish material goes down: shingles, metal panels, or another product, depending on what you chose. Straight, even shingle lines and properly spaced nail patterns are signs of careful work. Ventilation components, ridge vents and soffit vents, get installed or reconnected here too, since poor attic ventilation shortens the life of any roof, no matter how good the shingles are.
Cleanup and final walkthrough
A thorough crew uses tarps to catch debris as it comes off the roof and runs a magnetic sweep of the yard, driveway, and any garden beds for stray nails before calling the job finished. The final walkthrough is your chance to check the work with the contractor present: flashing looks clean and tight, gutters and downspouts are reinstalled, vents are not blocked, and shingle lines are straight with no exposed nail heads. Bring up anything that looks off during this walkthrough rather than after the crew has left, since it is much easier to fix while the ladders and materials are still on site.
| Phase | What happens | Typical duration |
|---|---|---|
| Prep | Permits, material delivery, property protection | 1-5 days before work starts |
| Tear-off | Old roofing removed, decking inspected | Morning of day one |
| Repair | Any rotted decking replaced | Same day, if needed |
| Underlayment and flashing | Ice-and-water shield, underlayment, new flashing | Day one or two |
| Installation | New shingles, metal, or other material installed | Remainder of the job |
| Cleanup | Debris removal, nail sweep, final walkthrough | Last hour of the final day |
Ask for a written manufacturer warranty on the materials and a separate workmanship warranty from the contractor covering their labor. The two are different, and a contractor who only offers one is leaving you exposed if an installation error causes a leak down the line.
You can read more about how we evaluate contractors on quality and responsiveness in our methodology, and see the full directory for roofing contractors serving Hartford Metro.
Frequently asked questions
- How long does a roof replacement actually take?
- A standard single-family home takes one to three days once work starts. Larger roofs, steep pitches, multiple layers of old shingles, or extensive decking repair can push that to four or five days.
- Do I need to be home during the work?
- Not for the whole job, but most crews want someone reachable in case they find decking damage and need approval before replacing it. Being home for the start and the final walkthrough is worth doing if your schedule allows it.
- Will the crew damage my landscaping or driveway?
- A careful crew uses tarps, plywood, and staging to protect gutters, siding, AC units, and plants near the house, and does a magnetic sweep for stray nails at the end. Ask how they protect the property before work starts, not after.
- What happens if it rains partway through?
- Crews plan around forecasts and will not tear off more roof than they can cover or finish before weather rolls in. If your roof is left partially open, it should be tarped and sealed at the end of every work day.
Related on this site
- Browse roof replacement providers
- What a roof replacement costs in Connecticut and what changes the price
- How to choose a roofing contractor: red flags and questions to ask
- How to avoid roofing scams and storm-chaser contractors in Connecticut
- Warning signs your roof needs attention, and when to call a pro
- All guides →